


Let's analyze APIs !
A comprehensive guide on APIs - Right from the basics to building your own.


There's a good chance that if you've worked with software you've heard of the term APIs. Your colleagues talk about them, the internet is full of memes about them, but you have no idea what they are. The term sounds daunting and like something only computer wizards and tech geeks know about. I was in the same boat, but after watching a ton of YouTube videos and some hands on experience, I'd like to help you get rid of this fear as well.
By the end of this guide, you'll know all about the basics of APIs, how to use them, and even how to build your own, along with some helpful tips on good API design.
Let's get started !

What are APIs ?
Imagine this scenario...
It's a Saturday night and you're feeling hungry. You head over to the nearest restaurant, "Le Fancy Restaurant". You take a seat, and wait for the waiter to come. A few minutes go by, but no waiter comes to take your order.

In-fact, you look around and notice there aren't any waiters at all ! You ask the family sitting at the table next to you, "Hey, where are all the waiters? Nobody's set up my table, and I even haven't gotten a menu yet. How do I get my food ?". "There are no waiters or menus. You just walk into the kitchen and get what you want", they reply.
As silly as this sounds, it's a Saturday night and you're starving. The only other option is to go home and eat last week's leftover noodles from the fridge.
You decide to take the gamble and head over to the restaurant kitchen.

You realize that you need silverware to eat from, so you grab the nearest cutlery you can find and head back to your table. But on the way back you drop a plate. Oops. Now you need food, but there's no menu, so you need to talk to the chef directly.
"Hello chef, what can I get to eat?"
"We have snowy-white steamed rice cakes, with a hint of semolina, along with a side of steaming hot lentil-vegetable stew, drizzled with a pinch of salt on top. We make them by first soaking the lentils in a bowl of water 3-4 times until the water runs clear. After that we drain the water and add fenugreek seeds to the rinsed lentils along with enough water, and soak for 6-8 hours or overnight. After this, we transfer the lentils to a grinder along with ice-cold water and then grind them to a light fluffy batter. Personally we use the 'TopGrinderCompany Mixer 3000™' for this step. You can test the consistency of your batter by......"
"Dammit ! I don't need to know all that. Just tell me the dish name !"
Of course the chef was talking about Idlis, but there's no way you understood anything of what he said. If only the waiter was there to explain things to you in simpler terms. You grab a plate of Idlis and head back to your table. On the way back, you notice one of the chefs' picking their nose and then resume kneading dough.. without washing their hands. Gross. You quickly have your meal at your table and then walk out of the restaurant. Of course, you conveniently forgot to pay, but there was no waiter to stop you.
So what went wrong ?
Everything !
- You shouldn't have been allowed direct access to the kitchen. You destroyed restaurant property (the plate) and you got to see some of the kitchen's dirty secrets, which they probably don't want anyone to see.
- The chef gave you an incoherent description of what you wanted to know and wasted your time. All you wanted to know was the dishes, not how they're prepared and made.
- You ate and left without paying and there was nobody there to stop you.
How could the restaurant have prevented all this ?
The Waiter !
The waiter would've acted as a layer between you and the kitchen. They'd bring you the menu, describing the food items in an easy to understand way. There would be no need for you to enter the kitchen in the first place, so you wouldn't destroy any valuable property of the restaurant. If you'd tried to leave without paying, the waiter would've stopped you. And of course you'd be hidden from all the nasty things that go on behind the scenes at a restaurant.
What does this have to do with APIs ?
As you've probably guessed by now, the waiter was an analogy for an API. An interface which allows you, the client, to communicate with the kitchen, or the server.
API stands for Application Programming Interface. It is a way for two or more computer programs to communicate with each other. It is a type of software interface, offering a service to other pieces of software.
Now that we've seen a real-world analogy, let's look at a slightly more technical explanation.
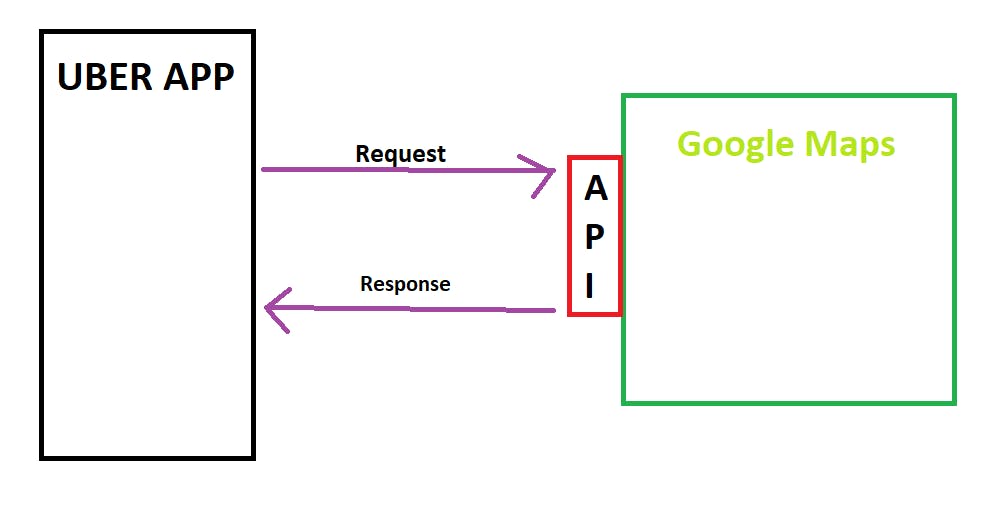
Consider Uber, the taxi app.

From the moment you book a taxi to the moment your ride ends, you can see a detailed map view of the route, the roads, your drivers location and more. So how did Uber manage to build such a detailed map across every corner of the globe, maintain and scale that app along with day-to-day updates while also considering varying factors such as traffic and weather. They didn't.
They use the Google Maps API. The API allows Uber to use the Google Map services (which Google spent a considerable amount of time and effort into building) to get all the information they need, while Google only exposes the information it wants. The Google API ensures that Uber doesn't go sneaking around the Google Maps databases and steal sensitive info. So the Uber app makes a request to the Google Maps API for information regarding its drivers locations, the map of the area, local traffic etc. The API verifies this request, and returns the data back to the Uber app. If the Uber app had asked for something a little more personal, like the passwords of their driver's Google accounts, the API would block that request and protect the sensitive information.
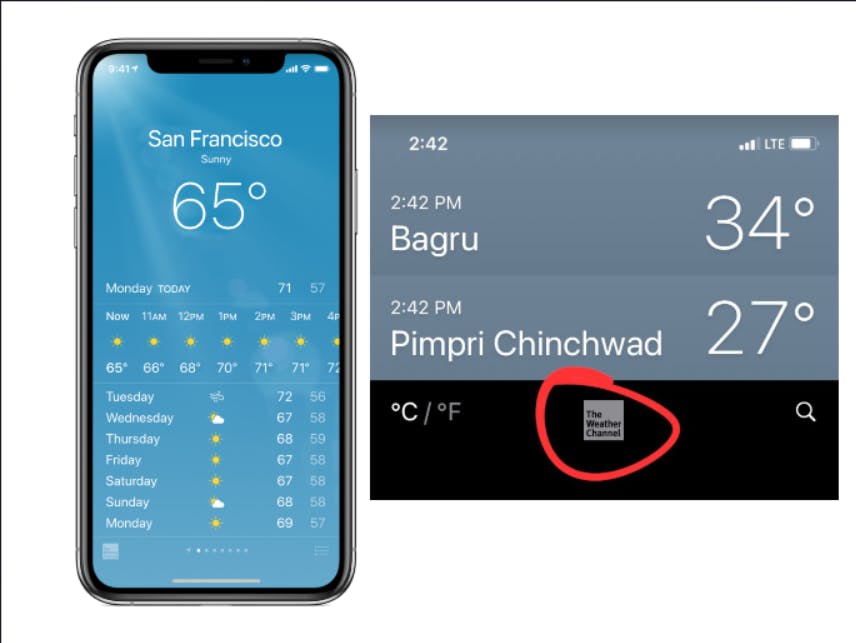
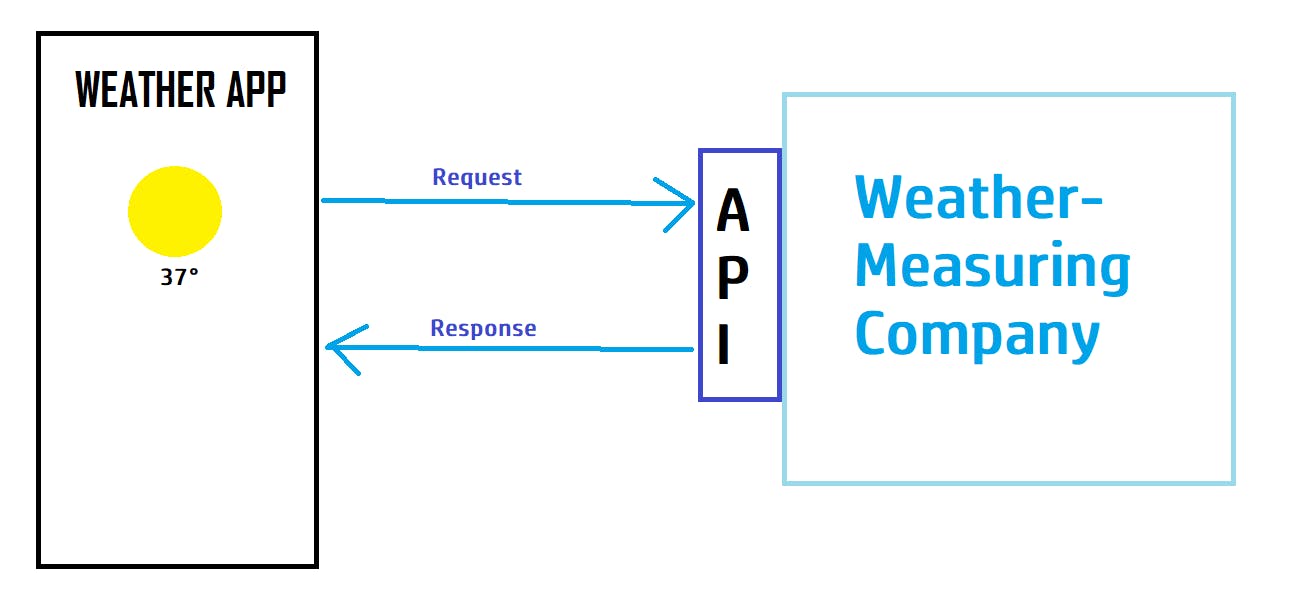
Consider the weather app on your phone. Do you really think that the app company has gone around the globe, setting up weather sensors, thermometers, anemometers and all other sorts of weather-measuring jargon everywhere just for their app ? Of course not. These apps also make use of APIs, which fetch the data for them. All the apps do is present that data for you, so you don't have to use the API yourself. For example, the weather app present on iPhones uses 'The Weather Channel API'. Apple hasn't actually traveled to each part of the world and set up weather-measuring devices. They let other companies do that work, and use the API to get the final results for them.
HTTP and JSON
Since there are millions of applications, APIs and services, there needs to be a standard of communication for the API to understand. The response and request we send and receive from the API have to be standardized. One such common protocol is the HTTP (HyperText Transfer Protocol), which was designed for communication between web browsers and web servers, but it can also be used for other purposes. A protocol defines the format of the data which is shared between programs and the type of data it should contain. It also specifies how the whole communication process unfolds. Without a protocol, programs might get confused about the data being shared amongst each other, since there are no specific rules about how the data has to be formatted.

The HTTP has a few methods, each of which serve a different purpose. The most commonly used ones are -
GET : Indicating that we want to request data from a particular source. We don't want to modify/change any data, we just wish to read it.
POST : Indicating that we want to create or update a particular resource.
PUT : Similar to POST, but PUT requests are idempotent. That is, calling the same PUT request multiple times will always produce the same result. In contrast, calling a POST request repeatedly have side effects of creating the same resource multiple times.
DELETE : Indicating that we wish to delete a particular resource.
If we take the example of an airline app, The GET request could be used to fetch the details of all available flights on a particular date. We're not making any changes in the airline database, just reading some information. The POST request could be used by us to book a seat on a flight. In this case, we're making changes in the airline database by sending our information and having them reserve our seat. The PUT request could be used to update/change our seat location (who doesn't want that window seat), and the DELETE request could be used to delete our booking. These 4 actions are collectively called CRUD operations - Create, Read, Update, Delete.
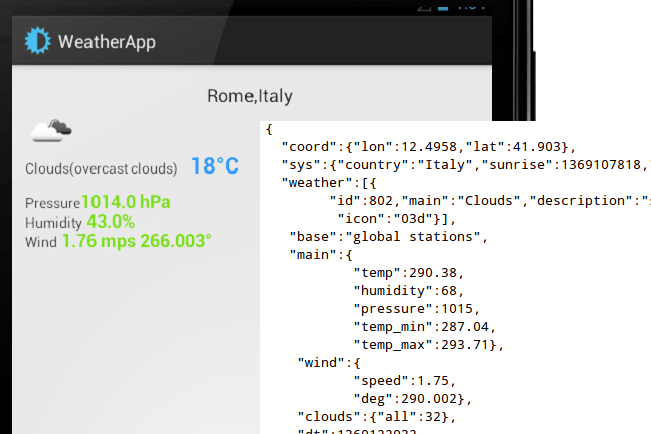
When communicating with APIs, we often send our data to the API using an HTTP request where we specify what kind of request we're making (GET/POST.. etc), and the API returns a response to us. In a weather app, our request might be to "get the current weather in New York" and the API would respond to us with the weather in New York. This response is commonly in the JSON (Javascript Object Notation) format. It's an open standard file format and data interchange format that uses human-readable text to store and transmit data objects consisting of attribute–value pairs and arrays. The weather app response could've been like :
- The weather in NEW YORK is 27 DEGREES
- Weather : 27°, City: NY, USA
- New York is currently experiencing a temperature of 27°
As we can see, there are many ways to write the same thing. We can choose 1 specific format to write the data and use that consistently everywhere. For example, if we choose the 2nd format from up above, different responses will look like :
- Weather : 27°, City: NY, USA
- Weather : 11°, City: LON, UK
- Weather : 30°, City: DEL, IND
- Weather : 33°, City: CAN, AUS
or like this in the 3rd format :
- New York is currently experiencing a temperature of 27°
- London is currently experiencing a temperature of 11°
- Delhi is currently experiencing a temperature of 30°
- Canberra is currently experiencing a temperature of 33°
Similarly, JSON defines a specific format in how the data is arranged. By using JSON we can ensure that the data sent between applications adheres to a specific set of rules. This helps in extensibility, and apps can communicate with each other easily, since they know the response follows a set of rules which they're both aware of.
There are other protocols apart from HTTP such as SFTP, UDP, XMPP and more, and data formats other than JSON such as XML and YAML, but we'll be focusing on HTTP and JSON in this guide.
Using an API
So far we've looked into what APIs are, what they're used for and how they work. Now it's time we get our hands messy and actually use one.
There are thousands of super cool and free APIs for us to use, you can check out the an entire list on Github here (make sure to star the repo !).
The one we'll be working with is a weather API called 'Weather API' (a very creative name). The link to website is - weatherapi.com.
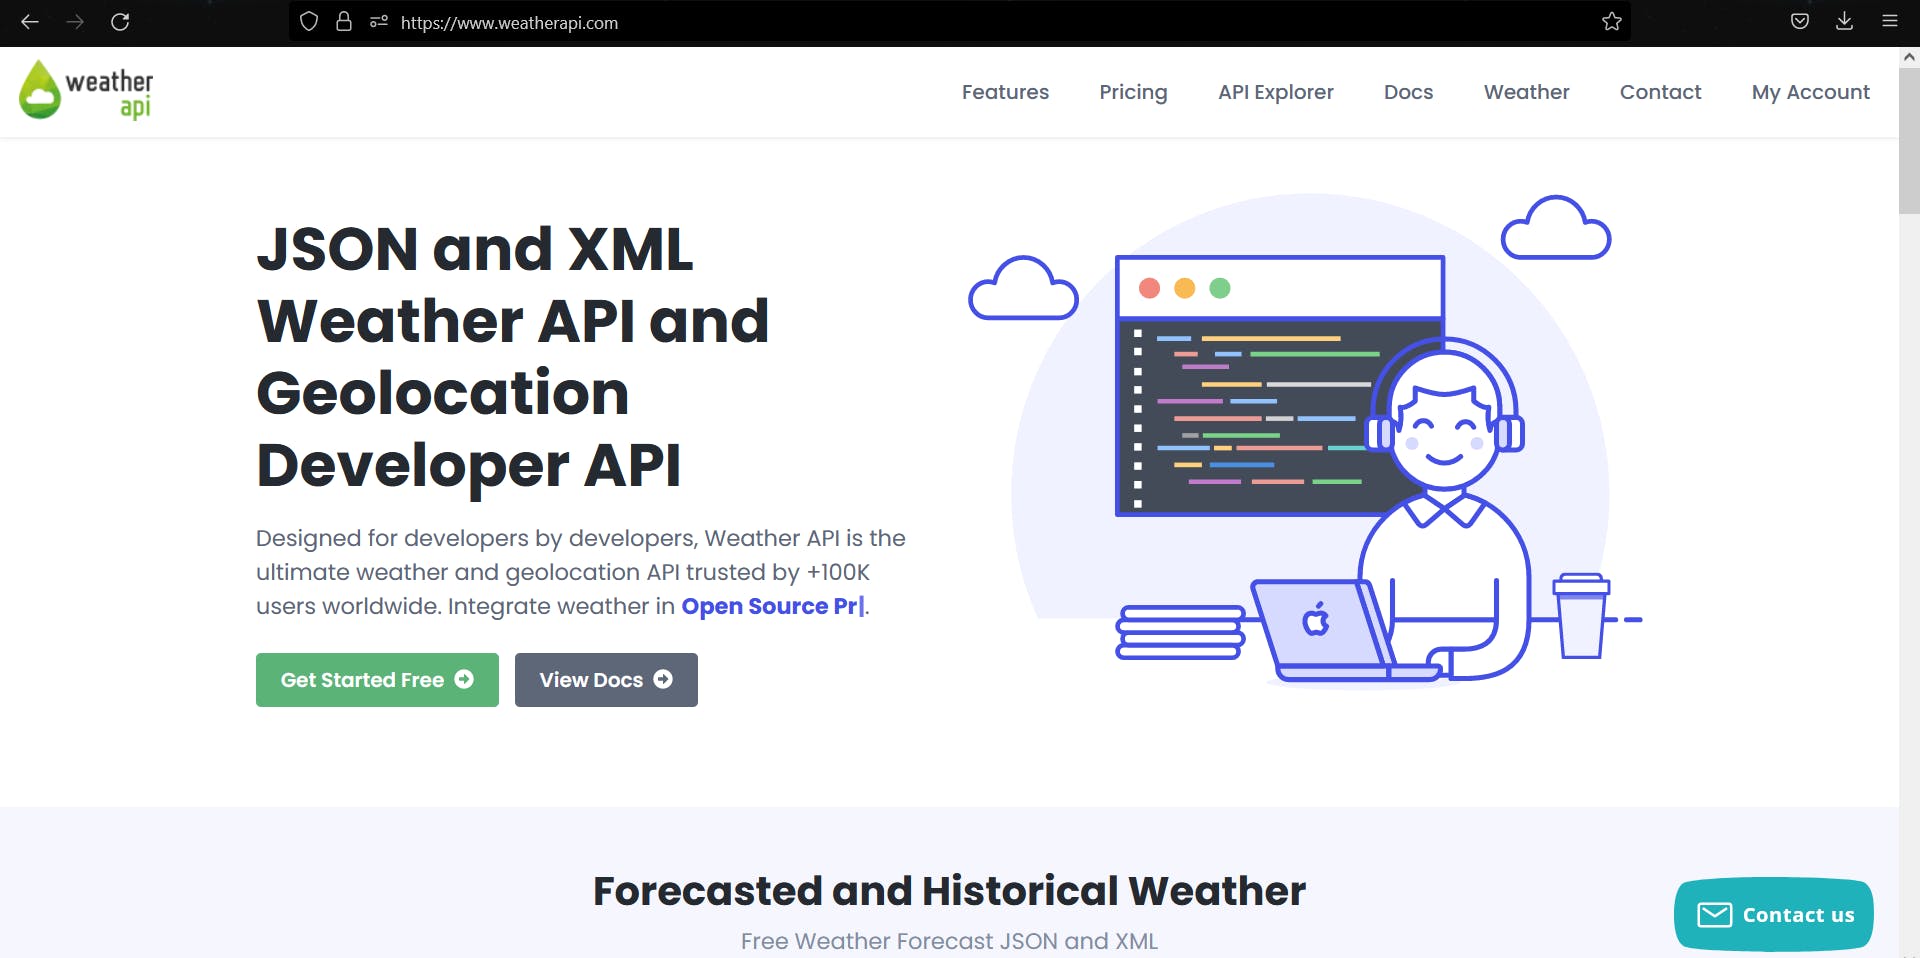
After signing up on their website and heading to your account, you should see a page that looks like this -
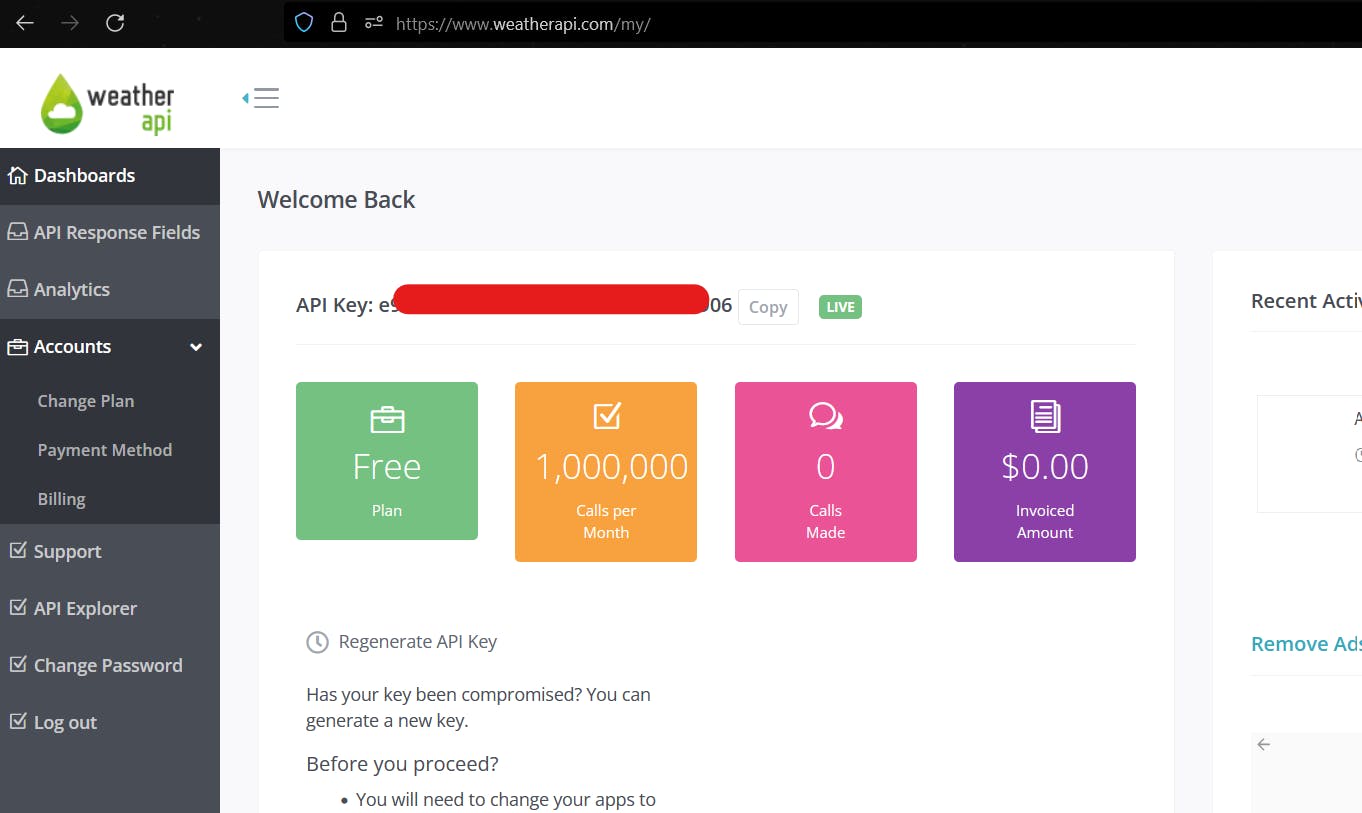
You might've noticed I've hidden my API Key, which we haven't talked about so far.
API Keys - It is a code used to identify and authenticate an application or user. API keys are commonly used to control the utilization of the API’s interface and track how it is being used. This is often as a precaution to prevent abuse or malicious use.
Not all APIs require an API key, but if they do, make sure you DON'T share your API key with anyone else, otherwise they could make malicious requests to an API making it look like you're the one making the requests.
Copy your API Key, and then head over to the 'API Explorer' tab on the left side of your screen.
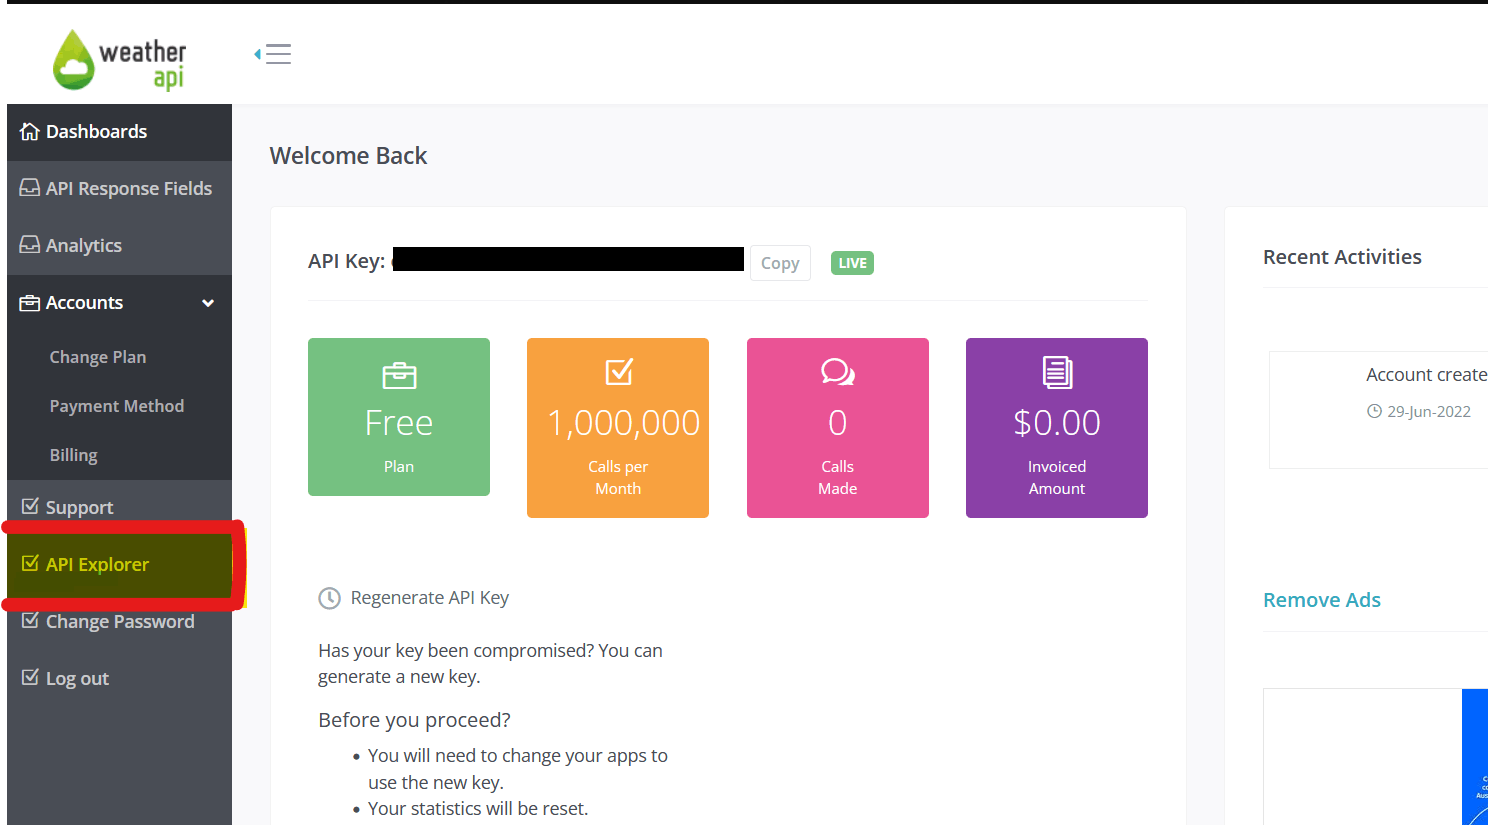
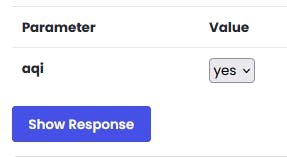
On this page, you should see an interactive API explorer. Enter your API Key (which you copied from your dashboard on the previous page) in the first field. The next 2 fields are the protocol we wish to use and the data format. These are set to HTTP and JSON by default, we don't want to change them for now. The next field is the city name, where we enter the name of the city of which we want to know about. There are different formats in which we can pass the city (such as postcodes or latitude-longitudes), but we'll enter a plain city name for now. The parameter 'aqi' has been set to 'no', which means the Air-Quality Index of the city mentioned will not be returned in our request.
 Click on Show Response and the result should look something like this -

The 'Call' is what was actually sent to the API when you hit the 'Show Response' button. If the comfort of the button wasn't there, you'd have to type all that out in order to send the request.
 The response code 200 means that the HTTP request we made was successful. Some HTTP response codes are:
- 200 : Request made successfully
- 400 : Bad request
- 404 : Not found
- 500: Internal server error
You can find the others here.
We also have the response header (which you don't have to worry about too much ):
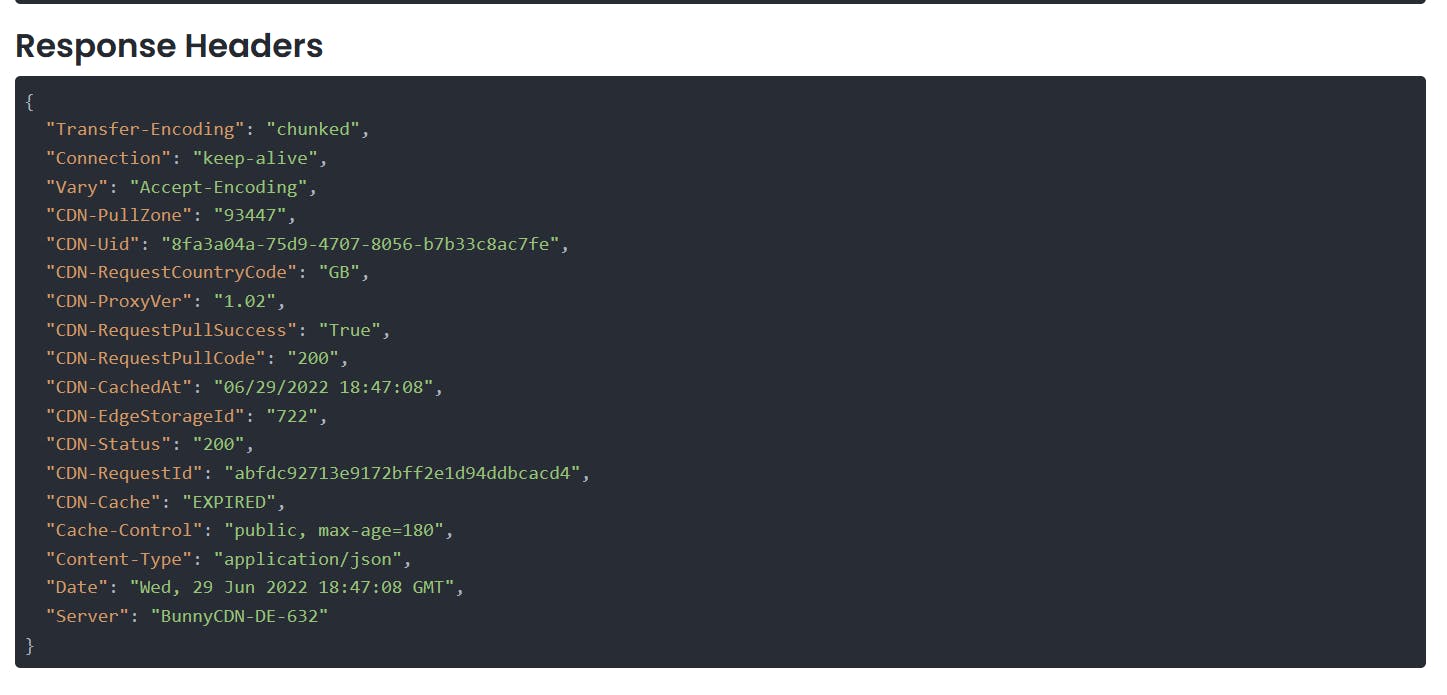
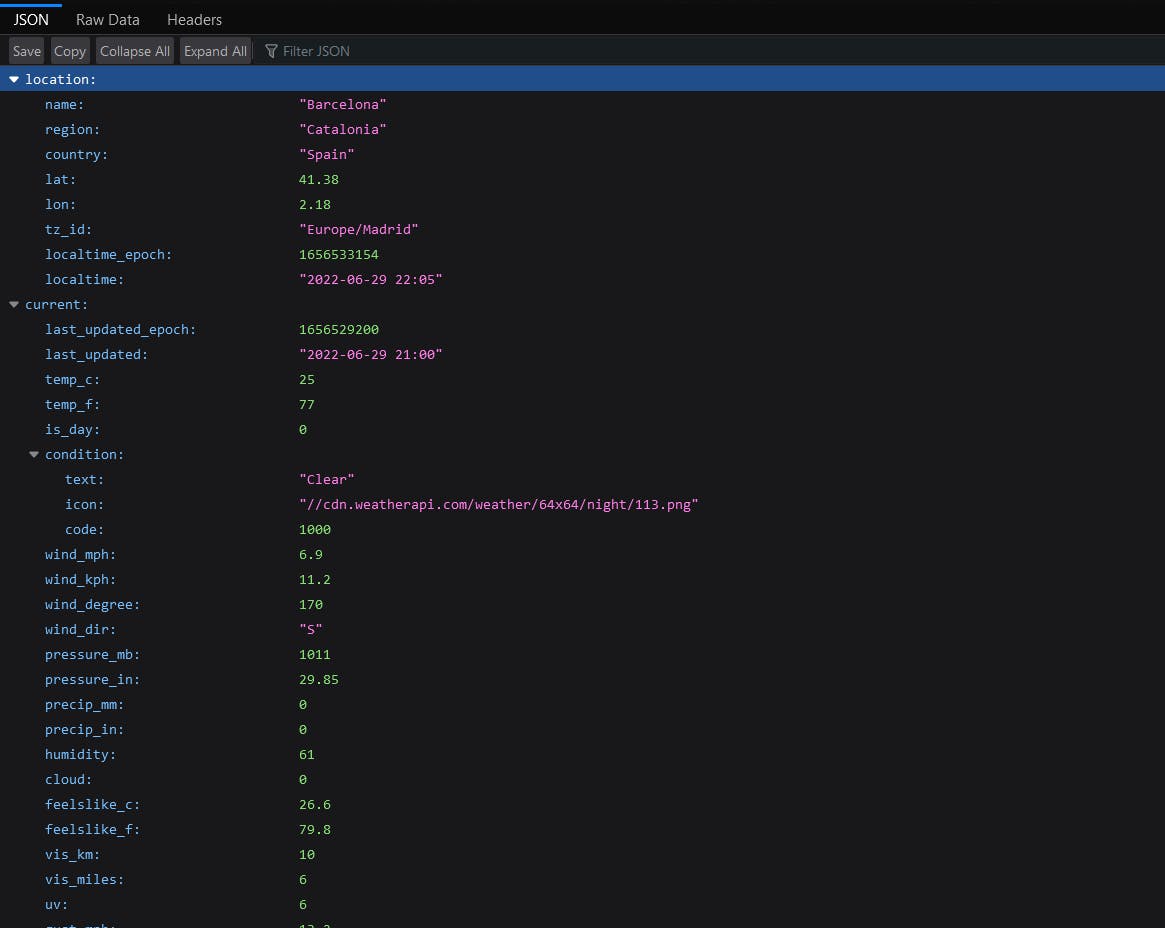
And of course, the main content we wanted -
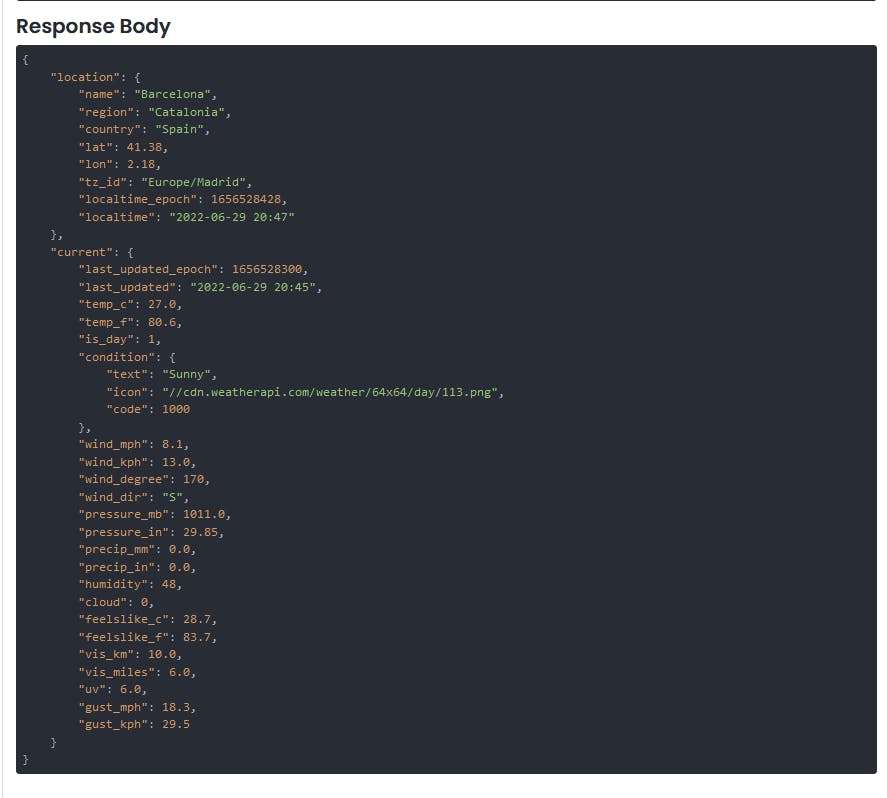
If you look closely, we've got all the weather details for the city of Barcelona in Spain. The response returned has given us data such as :
- City name
- Region
- Country
- Exact latitude and longitude
- The current temperature in °C and °F
- The wind speed and direction
- Humidity
- And a lot more
You might've noticed that the Air-Quality Index (AQI) for Barcelona is not included in the response. This is because we'd explicitly mentioned to NOT include the AQI in the response while sending the request. We did this when we mentioned the aqi value as 'no'. If we change that parameter to 'yes' and make a request,
Our response will include the AQI as well now !
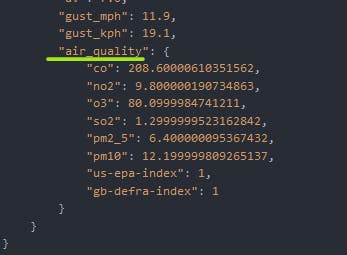
So each time we make a request, we can change what exactly we're asking for based on what we need, similar to how we said 'no' to getting the AQI in the first request.
But of course you won't be using the interactive API explorer when you use the API in your apps. To learn how to use the API through your browser, first go to the documentation page. This page contains a comprehensive description of the different services their API provides, the parameters you can pass in along with examples and more.
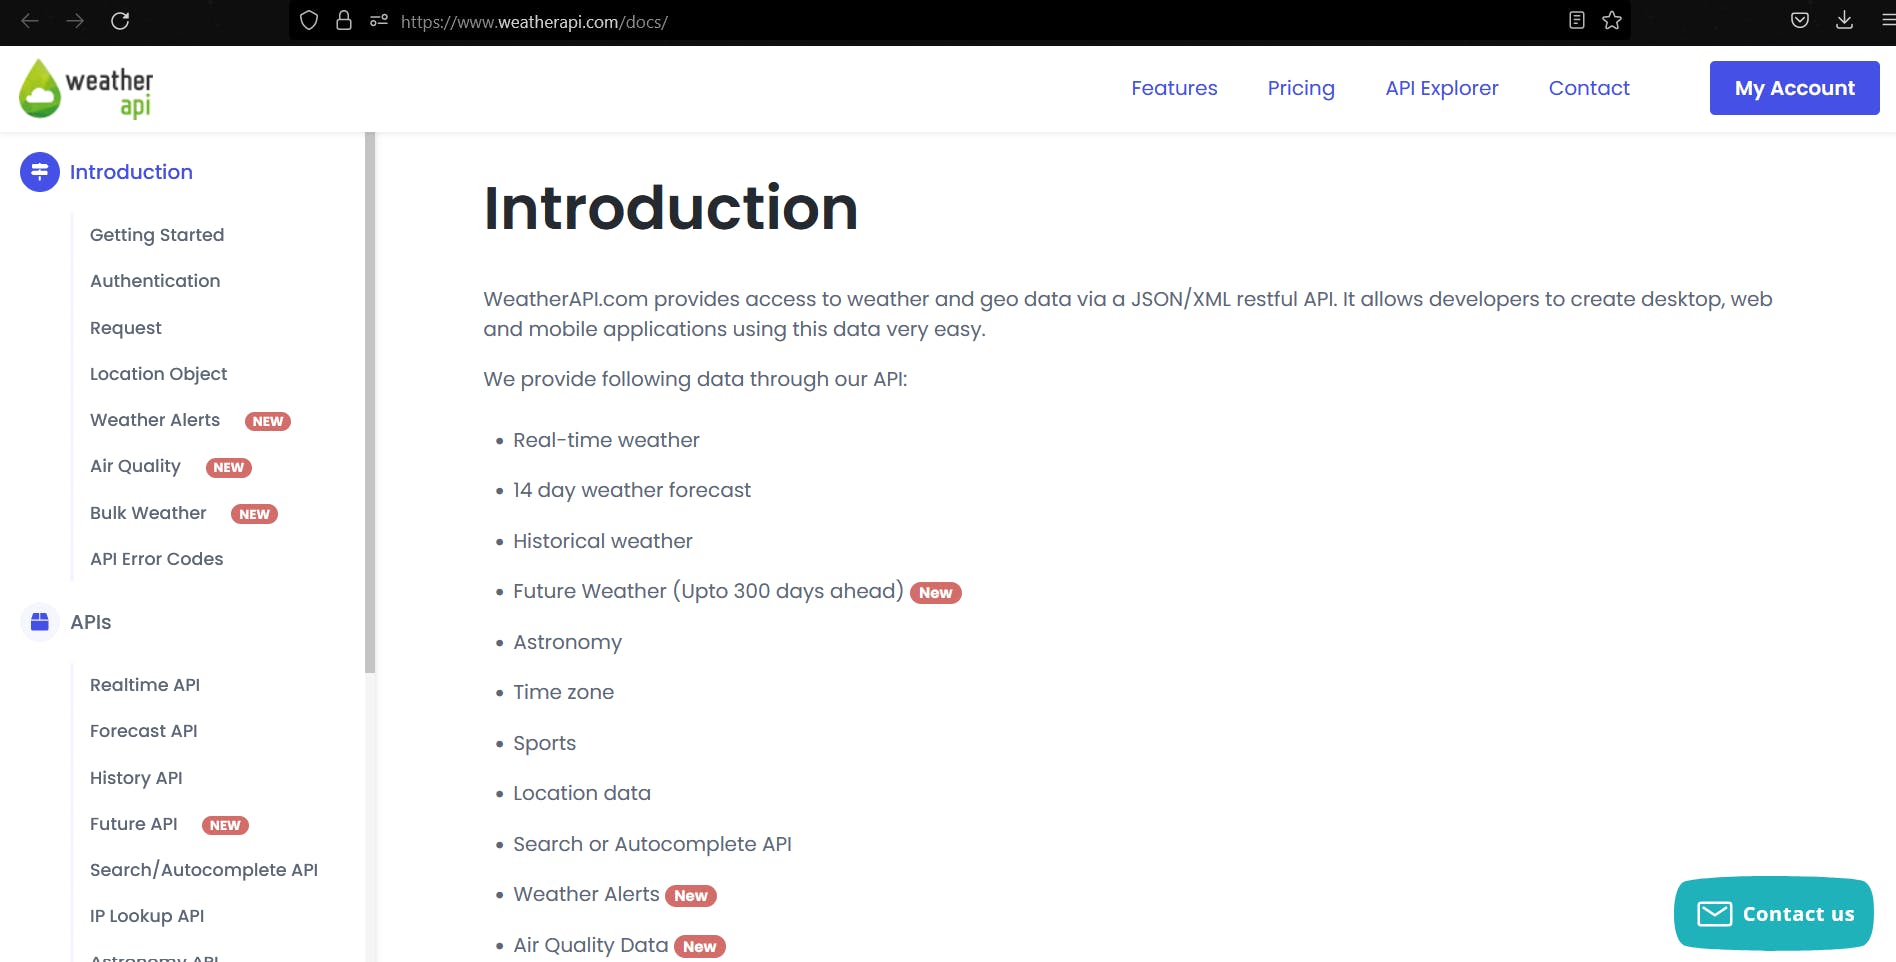
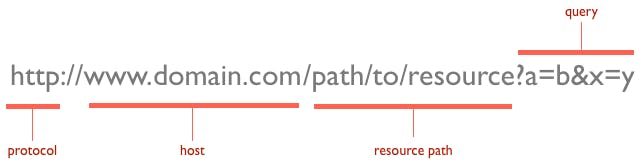
If you scroll down, you'll come across the base URL.

Copy this into a new browser tab,

Since we've already looked into current weather forecasts through the API explorer, let's try weather forecasts now. The WeatherAPI provides lots of different services. The column on the left is the name of the service, and the right column gives the API method name which we'll be copying in our browser search bar.

Copy the '/forecast.json' and append it to the search bar query you opened in a new tab which should now look like this,

You now want to append your API Key,city name and the number of days we want fore-casted to it, which should eventually look like this :

Or you can copy this if you're lazy like me.
api.weatherapi.com/v1/forecast.json?key=<Your Key Here>&q=Barcelona&days=3
This request will return the the weather forecast for the next 3 days (today included) in Barcelona. If we click enter,
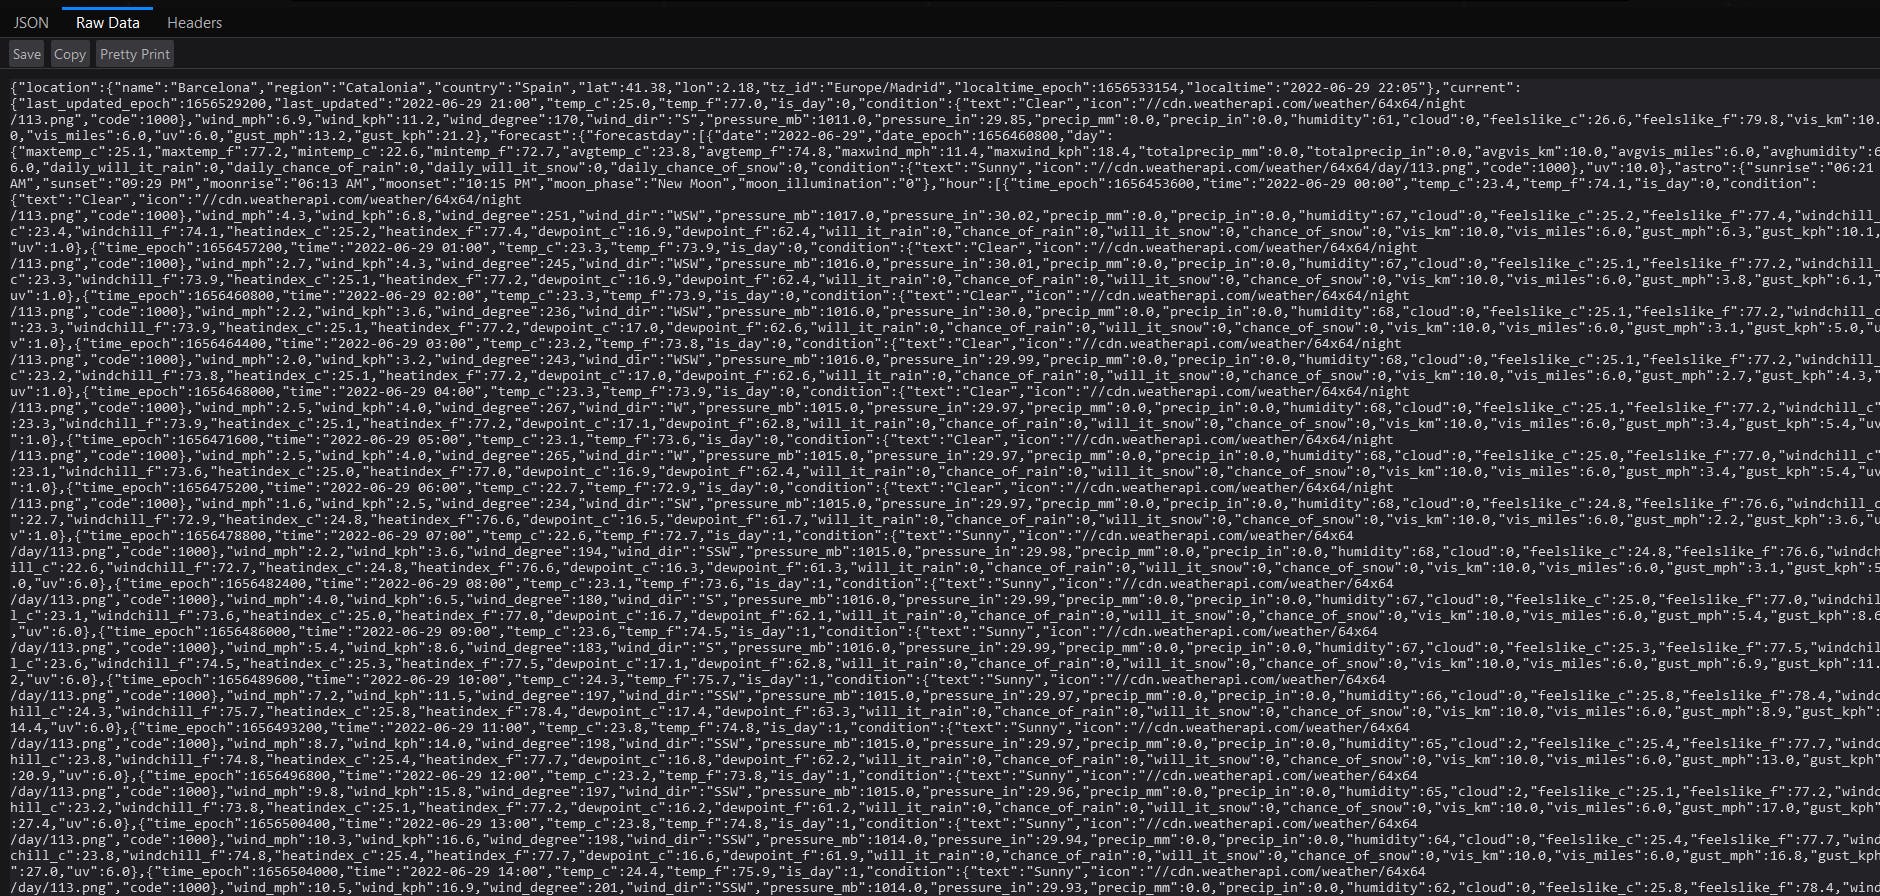
Voila ! Although it's not as pretty as we would've wanted, we now have the weather forecast for the next 3 days in Barcelona. If we want a easier-to-read view of the same, you can click on the 'JSON' button in the top left corner of your screen in Firefox.
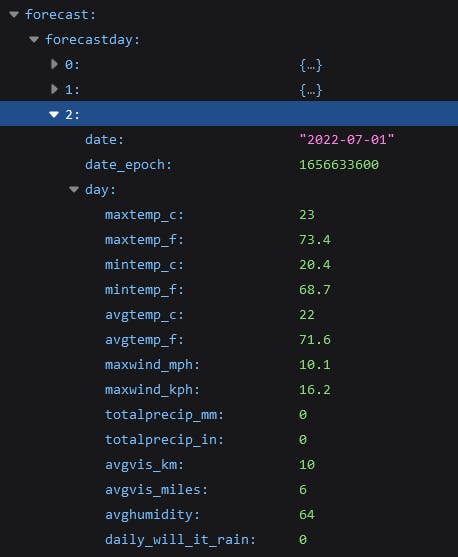
Much better. If we scroll down a bit, we can see the daily forecast for the next 3 days (0-today, 1-tomorrow, 2-day after tomorrow).
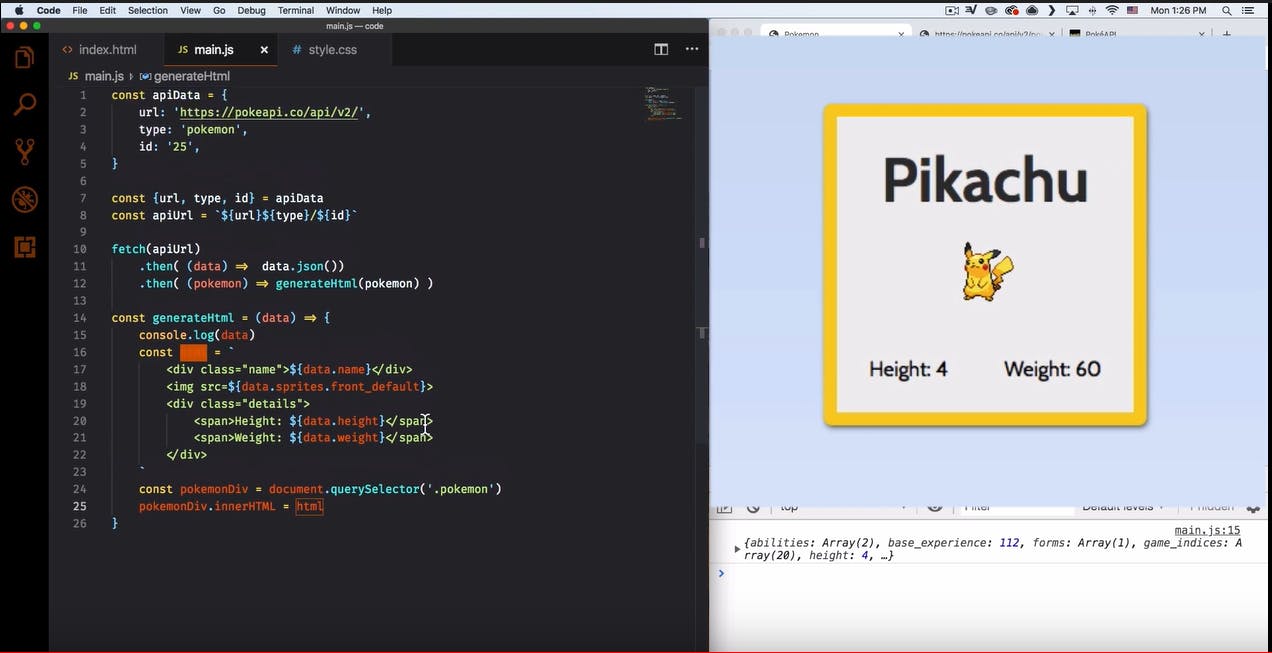
Very nice! Now that you have an idea of how to use an API, you can try out the different features of the weather API or use some other APIs from the Github link mentioned above. In all of the responses we've gotten so far, the data is in boring old JSON, which isn't what we're used to seeing in apps or other services. I came across this really fun 17min tutorial on YouTube by iEatWebsites, in which you use a Pokemon API to build your own rudimentary Pokedex. I'd recommend you give that a try since it'll help you apply what we've learned so far, and the end result is awesome !
Learning to build our own API !
We've seen what APIs are. We've seen where they're used. We've even used an API, and if you watched the YouTube video, you even made a small app using an API. Congrats !
In the final stage of this guide, we'll be working on building our own API. Our API will be very simple - It can read, submit, update and delete blog posts to a database (A blog post consists of a title and some content). We'll be learning how to read and submit posts, and from there you can try the 'update' and 'delete' parts yourself (don't worry, I've mentioned some helpful resources at the end).
The prerequisites are :
- Basic knowledge of HTML and Python
- A code editor
- An understanding of what we've covered so far
We'll be using the Flask micro-framework to build our API. To install Python on your system (if you haven't done so already) and to set up Flask, please follow the tutorials mentioned below :

Note - Without the above steps, you won't be able to follow along with the rest of the tutorial, so make sure you install Python and Flask. If you don't have a code editor, you can follow this tutorial to install VSCode on Windows or this one for MacOS.
Let's get started !
In order to make the API easier to use and access, we're going to create a simple HTML form. If you followed the video tutorials mentioned above, you should be familiar with how to set up and run your Flask project. Just to confirm, it should look something like this :
 And your main file called 'app.py' should contain something similar to this code,
from flask import Flask

app = Flask(__name__)

@app.route('/')
def index():
    return 'Hello World'
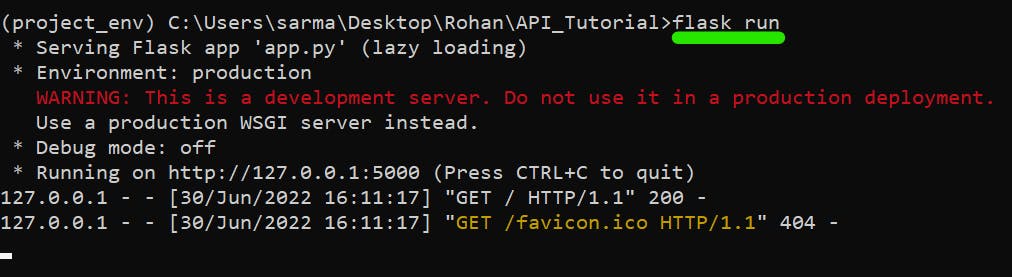
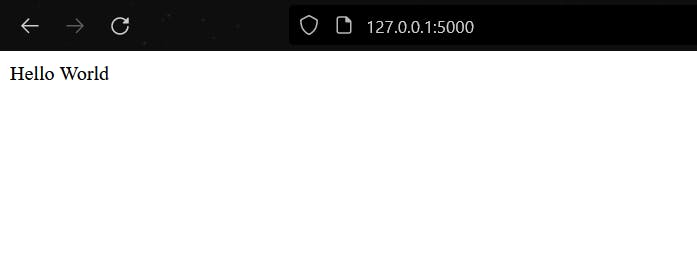
If you run the command flask run inside your virtual environment, the application should start and you can visit http://127.0.0.1:5000/ in your browser to view the result.
If everything works well till now, great ! Otherwise you may need to go back to the tutorials on setting up Python/Flask and most probably will need to refer to StackOverflow.
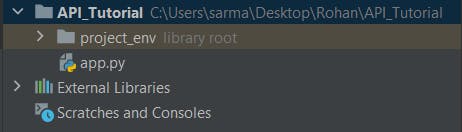
To create our HTML homepage, create a directory named 'templates' directly under your root directory (in my case, API_Tutorial). Inside the 'templates' directory, create a new HTML file. You can name it whatever you want, but I've named mine homePage.html. Your file structure should look like this :
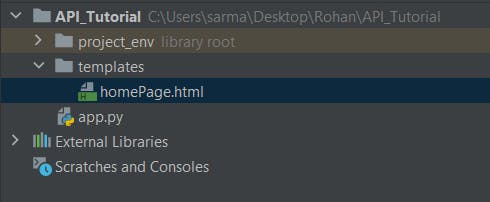
Note - The directory name you created should be templates only. You can name it something else, but Flask searches for HTML pages in the folder named 'templates' by default, so naming it something else means you'll have to specify other configurations for Flask to search in the folder you want.
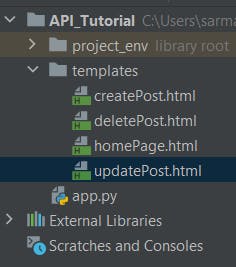
Since we don't have any blog posts to display on our home page yet, let's just create simple pages and links to webpages to Create, Update and Delete blog posts for now.
Create 3 new HTML pages inside the templates folder called createPost.html, deletePost.html and updatePost.html.
Enter the following code in each of the HTML pages -
- createPost.html
<html>
<body>
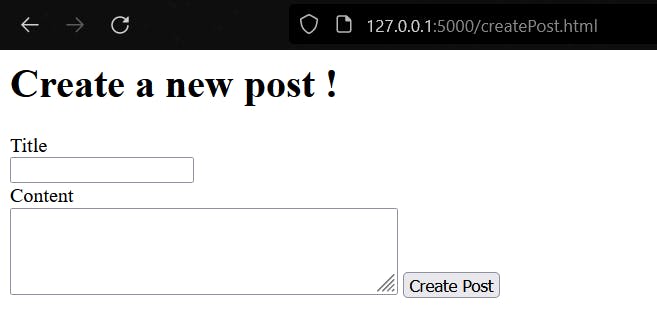
<h1>Create a new post !</h1>
<form>
<label for="title">Title</label><br>
<input type="text" id="title" name="title"><br>
<label for="welcomeMessage">Content</label><br>
<textarea name="welcomeMessage" id="welcomeMessage" rows="3" cols="40"></textarea>
<input type="submit" value="Create Post">
</form>
</body>
</html>
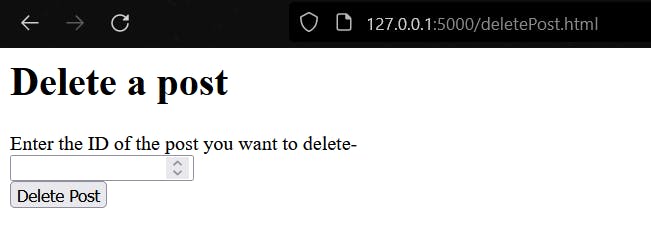
- deletePost.html
<html>
<body>
<h1>Delete a post</h1>
    <form>
         <label for="pid">Enter the ID of the post you want to delete-</label><br>
         <input type="number" id="pid" name="pid"><br>
         <input type="submit" value="Delete Post">
    </form>
</body>
</html>
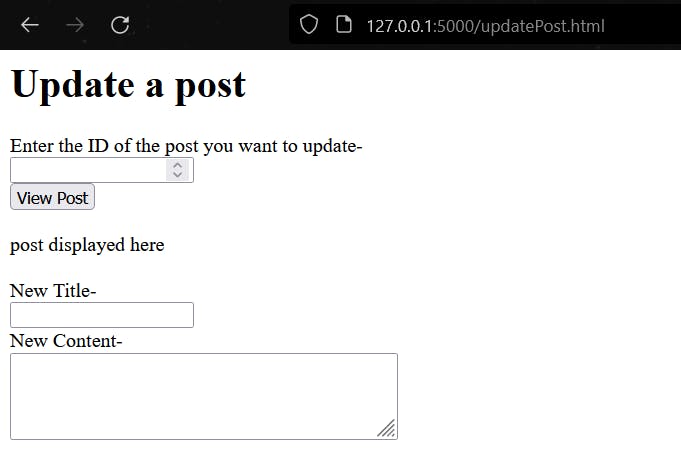
- updatePost.html
<html>
<body>
<h1>Update a post</h1>
    <form>
         <label for="pid">Enter the ID of the post you want to update-</label><br>
         <input type="number" id="pid" name="pid"><br>
         <input type="submit" value="View Post"><br><br>
            post displayed here<br><br>
         <label for="title">New Title-</label><br>
         <input type="text" id="title" name="title"><br>
         <label for="welcomeMessage">New Content-</label><br>
         <textarea name="welcomeMessage" id="welcomeMessage" rows="3" cols="40"></textarea>
    </form>
</body>
</body>
</html>
Head over to homePage.html we'd created earlier and copy this code into it -
<html>
<body>
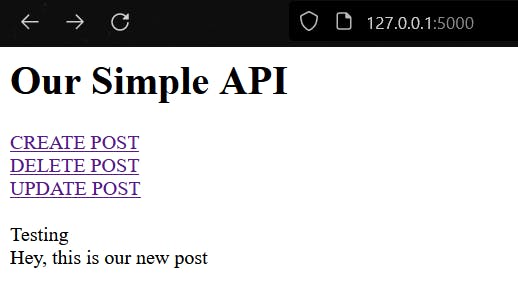
<h1>Our Simple API</h1>
<a href="{{ url_for('create_post') }}">CREATE POST</a><br>
<a href="{{ url_for('delete_post') }}">DELETE POST</a><br>
<a href="{{ url_for('update_post') }}">UPDATE POST</a><br>
</body>
</html>
We're using url_for instead of direct links to the webpages. This is because url_for in Flask is used for creating a URL to prevent the overhead of having to change URLs throughout an application (including in templates). Without url_for, if there is a change in the root URL of your app then you have to change it in every page where the link is present.
We also need to route our webpages to the correct URL. To do so, go into app.py and change the code so that it looks like this -
from flask import Flask, render_template

app = Flask(__name__)

@app.route('/')
def home_page():
    return render_template('homePage.html')

@app.route('/createPost.html')
def create_post():
    return render_template('createPost.html')

@app.route('/deletePost.html')
def delete_post():
    return render_template('deletePost.html')

@app.route('/updatePost.html')
def update_post():
    return render_template('updatePost.html')
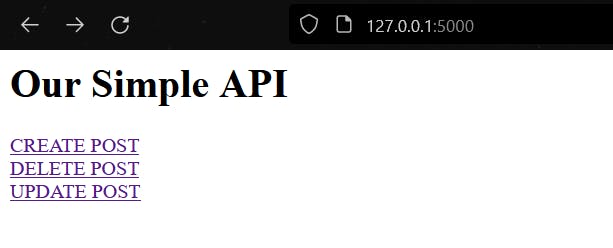
Now each time http://127.0.0.1:5000/createPost.html is called, our app executes the function called create_post() which renders our HTML page createPost which we created just a while back. Similarly the other 2 pages are rendered on the screen each time we click on the links from the home page.
Our website will look like this now :
Cool ! So now we have our basic forms set up, which will take data in and interact with the database where the posts are stored. To store our posts in a database, we first need to create a database.
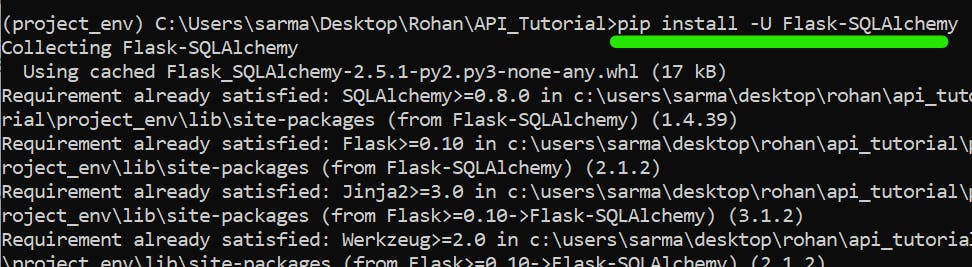
To do so, we'll be using SQLAlchemy, an open-source SQL toolkit for Python. To install it, enter the virtual environment we created and enter :
pip install -U Flask-SQLAlchemy
We're going to be making some changes to app.py. We need to import the SQLAlchemy module into our app. For that, copy -
from flask_sqlalchemy import SQLAlchemy
and copy this AFTER the line app=FLASK(__name__),
app.config['SQLALCHEMY_DATABASE_URI'] = 'sqlite:///data.db'
db = SQLAlchemy(app)
To create a 'class' (or a table in database terms) for our Posts, copy this code into app.py,
class Post(db.Model):
    id = db.Column(db.Integer, primary_key=True)
    title = db.Column(db.String(40), unique=True, nullable=False)
    content = db.Column(db.String(120))

    def __repr__(self):
        return f"{self.title} - {self.content}"
What this code snippet does is define a table in our database called 'Post'. The table contains 3 columns :
- id : The post ID. It is unique to each post and automatically assigned.
- title : The post title which is unique, can be upto 40 characters in length and can't be empty
- content : The post content which can be upto 120 characters long.
app.py should look like this now -
from flask import Flask, render_template
from flask_sqlalchemy import SQLAlchemy
app = Flask(__name__)

app.config['SQLALCHEMY_DATABASE_URI'] = 'sqlite:///data.db'
db = SQLAlchemy(app)

class Post(db.Model):
    id = db.Column(db.Integer, primary_key=True)
    title = db.Column(db.String(40), unique=True, nullable=False)
    content = db.Column(db.String(120))

    def __repr__(self):
        return f"{self.title} - {self.content}"

@app.route('/')
def index():
    return render_template('homePage.html')

@app.route('/createPost.html')
def create_post():
    return render_template('createPost.html')

@app.route('/deletePost.html')
def delete_post():
    return render_template('deletePost.html')

@app.route('/updatePost.html')
def update_post():
    return render_template('updatePost.html')
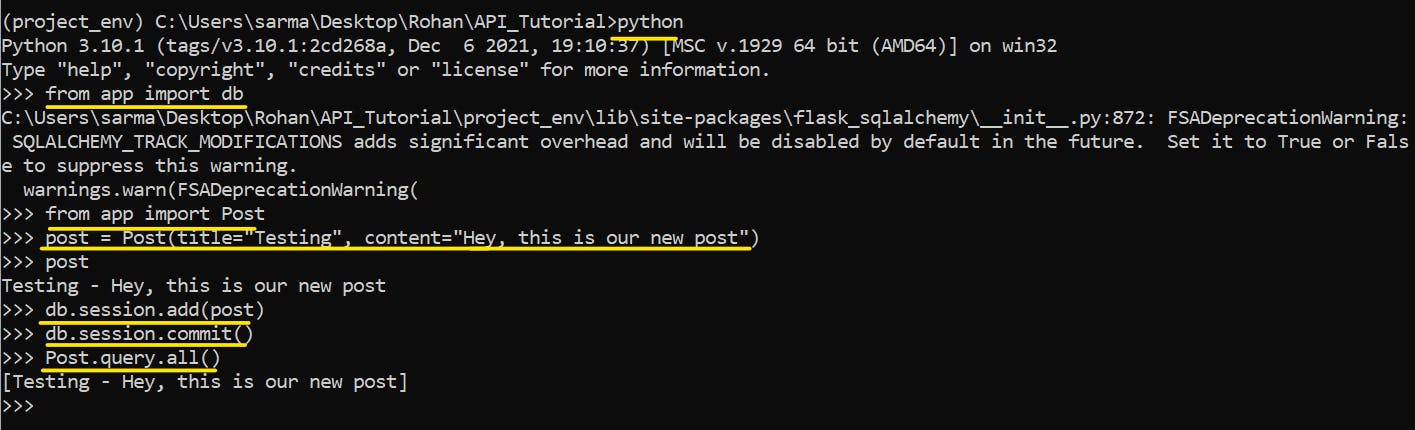
Open the terminal/command prompt and within the virtual environment, execute python or python3 (whichever works). A prompt with >>> will open up.
Enter from app import db, so that we can use our database instance within the python interpreter. Now enter from app import Post, so we can use our 'Post' class.
To create a new row/entry, execute the line post = Post(title="Testing", content="Hey, this is our new post!"). We've now created a new post with the title 'Testing' and the content of the post is 'Hey, this is our new post!'.
To add the post to our database, execute the following one after the other,
db.session.add(post),
db.session.commit()
And finally, to view the entire table (which contains only 1 record at the moment), enter Post.query.all().
Amazing ! So we've managed to create our database and even add a new post to it.
To display all our posts on the home page, we create a variable called posts which stores all the rows in the table Post. We pass 'posts' as a parameter to our HTML homepage. The home_page() method in app.py will contain this code now -
@app.route('/')
def home_page():
    posts = Post.query.all()
    return render_template('homePage.html', posts=posts)
And to display the posts on our homepage, we use a 'for' loop to go through all the posts in our database.
homePage.html
<html>
<body>
<h1>Our Simple API</h1>
    <a href="{{ url_for('create_post') }}">CREATE POST</a><br>
    <a href="{{ url_for('delete_post') }}">DELETE POST</a><br>
    <a href="{{ url_for('update_post') }}">UPDATE POST</a><br><br>
    {% for post in posts %}
     {{post.title}}<br>
     {{post.content}}<br>
    {% endfor %}
</body>
</html>
The updates home page now looks like :
As you can see, all the posts in our database have been displayed. For now we only have 1 post, but as we add more, they'll be displayed as well.
Adding posts from the terminal is fine, but that's definitely not how users will be consuming our API.
We now have to to setup the form, so that when we enter data through the createPost.html form, it will be added to the database.
Doing so is pretty straightforward. Change the create_post() method to the following-
@app.route('/createPost.html', methods=['GET', 'POST'])
def create_post():
    if request.method == 'POST':
        newPost = Post(title=request.form['title'], content=request.form['content'])
        db.session.add(newPost)
        db.session.commit()
        return render_template('createPost.html')
    else:
        return render_template('createPost.html')
Over here we're basically saying that this route can accept either a GET request or POST request. If it's a post request, we want to read the form data and create a 'newPost' using that data. Once we've created the post we add it to the database (similar to how we did it in the Python interpreter in the CMD). If it's GET request, we just display the page.
Let's try it out.
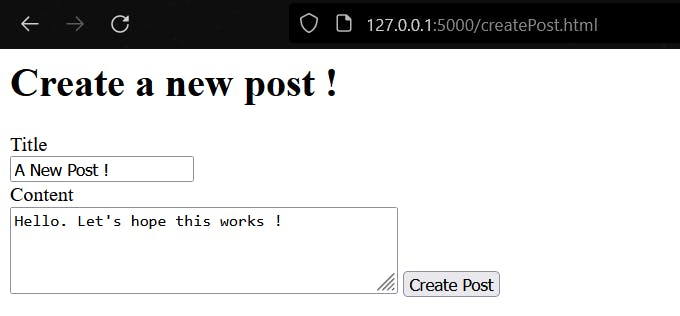
If we hit 'Create Post' and go back to our home page..
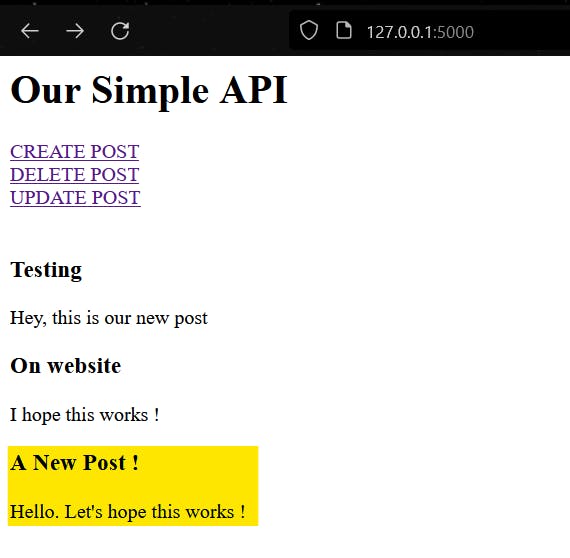
The new post is now visible on the homepage ! (We didn't create the 2nd post on the homepage in this tutorial, I'd added it while testing the app myself. Don't be alarmed as to why it's not on your system).
So we're about halfway done with our API ! We can view all the posts and also create new posts.
The other 2 operations - Updating and deleting records from the database is left as an exercise for you. Hopefully by now you have an idea of what to do. If you ever get stuck, here are some helpful resources -1, 2, 3 and 4. Good luck !
Note - HTML forms do not accept PUT and DELETE requests. You can workaround this by submitting the requests as POST requests, but then actually performing updates and deletions within your method.
Good API Design Practices
API design is the collection of planning and architectural decisions you make when building an API. Your basic API design influences how well developers are able to consume it and even how they use it. Designing a good API is important, not only from a client perspective, but from the companies' perspective too.
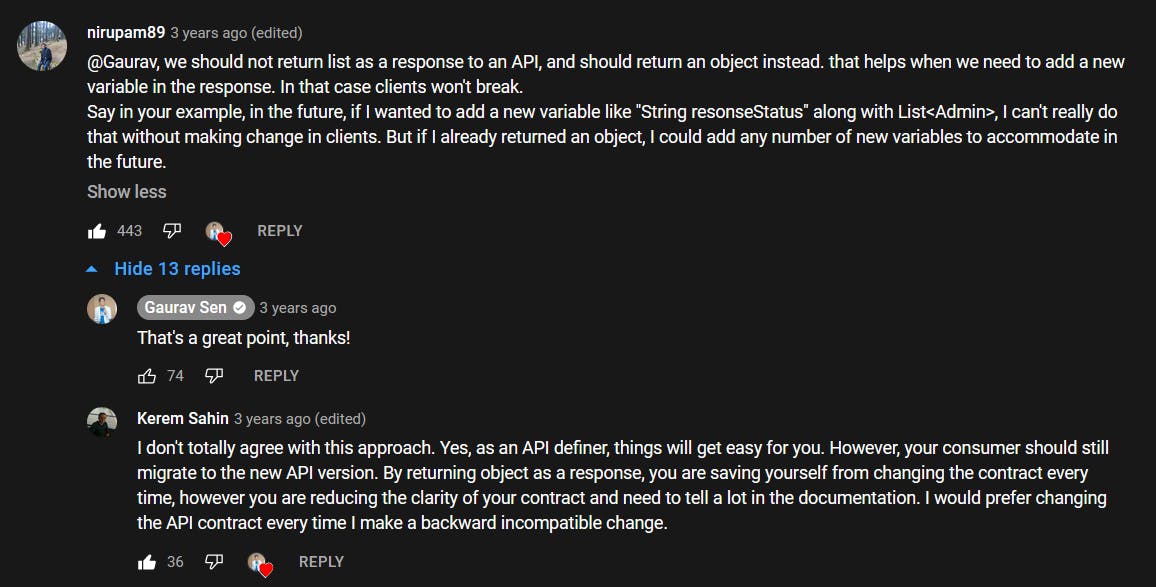
I came across this brilliant video by Gaurav Sen on designing good APIs.
Here's a summary of the important factors you should take into consideration while designing an API mentioned in the video -
Suppose you're designing an API for WhatsApp called getAdmins(String groupID). The API is used to find out the admins of a particular group (passed as a parameter).
Naming : Our API is used to return the admins of a group. If our API returns the names of the admins along with the groups of which they're admins, then while it may not seem like an issue, but our API is poorly named. The name is
getAdminsso it should be returning exactly that. If it were namedgetAdminsAndTheGroupsTheyBelongTo, then we could excuse the API returning both the names and groups. Even though this may sound like we're nitpicking, but we have to be very precise and clear with what each API does, and that starts from the naming.Parameters : In our API, we're passing in the parameter 'groupID' (which is a unique ID associated with each Whatsapp group). We could have also passed an entire list of all the members of a group, then finding which group contains all those members, and then returning the admins of that group. But that would be incredibly inefficient and not smart at all, since 2 or more groups could have the same members, not to mention how resource heavy the API call would be. Selecting the right parameter to pass to an API is important, since the right choice can reduce the time and resources needed to get the result. In some cases, your API might be communicating with other APIs and micro-services to fetch your response. In these situations, passing more parameters might improve the efficiency of your API, as those extra parameters could reduce the number of I/O calls made to get your response. Figuring out the right parameters is a tricky, but crucial task, and varies from situation to situation.
Response Definition : Even though the response is defined, choosing the right format in which the response is sent back to the client is also important. For example, when we're returning the admin names to the client after they've used our API, do we return our response in the form of a list (such as ['Ashok', 'Raj']) or should we be the entire response as as an object ? In the end, it's up to you to decide where to make the tradeoff. An interesting point can be made for both choices -
Errors : As the API designer, it's your responsibility to let the client know when something goes wrong while using the API. But how much responsibility should you bear ? On one extreme, for each and every error that could occur while using the API, you could return a very generic error message -
Something went wrong. Please try again laterOn the other extreme, you could be so precise and to calculate every single possible error that could occur, and generating individual error messages for each of them. Both of these practices are considered wrong. Rather you should figure out which of the errors are your responsibility, and which are the clients. In our WhatsApp API example, suppose a client enters a string which is too large to be a group ID as a parameter. This is NOT our responsibility. The client should realize that the entered string is too large. Instead of processing the query, we simply reject it. However if a group does not exist or has been deleted, it should be our responsibility to let the client know, since both are errors which can be assumed to have occurred. We should be clear about the expectations and responsibilities of an error/No Side Effects : Suppose we have another API, this time to set particular members of a group as admins. The API is defined as -
setAdmins(List <adminNames>, String groupID)2 cases where using this API could lead to side effects are :- One of the adminNames is not a member of that group, but when we call the setAdmins API, it first adds that person to the group and then makes them an admin.
- The group doesn't exist, so we first create the group and then make the mentioned names as admins.
Both cases have side effects (adding a member to a group and creating a new group), which we really didn't intend. We have to be careful that our API doesn't lead to side effects like these which can be costly.
- Breaking Down the Response : Imagine we have another API,
getMembers(String groupId)which returns a list of all the members in the group. The response might be very large, containing 1000s of member names. On the client side we'd want to break this list down across multiple pages so that it becomes easier to read and access through pagination. On the server side, we break down this huge response by fragmentation.
- Consistency : Most social media sites have comment sections along with their posts. While designing the comment section, the developer has to decide how consistent they want the comment section to be. That is, how recent do they want the data displayed to be. Do they want the user to see comments which were uploaded within the last 10 seconds ? For a live-stream, keeping the comment-section consistent with real time updates might be highly important, but for an Instagram post, it might not be that important for you to see comments which were uploaded just recently. Highly consistent data is expensive and resource heavy, but cached/not-that-consistent data is lightweight but also quick.

Where to now ?
If you've stuck around till the end, I hope you learnt something new ! There's still a lot more for me and you to learn about APIs. Go ahead and explore some of the free APIs available online. Try to build more of your own. Explore exciting API tools such as CherryBomb !

A huge thanks to CommunityClassroom for their monthly blogging challenge ! I got to learn so much more than I ever would've expected. Writing technical blogs is challenging, but rewarding. I hope I can share more of what I learn with the community.
Thank you !